


中文 英文 韩语 日语
话不多说,先上图
我的oled屏幕是ssd 1306 芯片驱动的,4针脚,只支持iic,不支持spi,双色的。
# Copyright (c) 2017 Adafruit Industries
# Author: Tony DiCola & James DeVito
#
# Permission is hereby granted, free of charge, to any person obtaining a copy
# of this software and associated documentation files (the "Software"), to deal
# in the Software without restriction, including without limitation the rights
# to use, copy, modify, merge, publish, distribute, sublicense, and/or sell
# copies of the Software, and to permit persons to whom the Software is
# furnished to do so, subject to the following conditions:
#
# The above copyright notice and this permission notice shall be included in
# all copies or substantial portions of the Software.
#
# THE SOFTWARE IS PROVIDED "AS IS", WITHOUT WARRANTY OF ANY KIND, EXPRESS OR
# IMPLIED, INCLUDING BUT NOT LIMITED TO THE WARRANTIES OF MERCHANTABILITY,
# FITNESS FOR A PARTICULAR PURPOSE AND NONINFRINGEMENT. IN NO EVENT SHALL THE
# AUTHORS OR COPYRIGHT HOLDERS BE LIABLE FOR ANY CLAIM, DAMAGES OR OTHER
# LIABILITY, WHETHER IN AN ACTION OF CONTRACT, TORT OR OTHERWISE, ARISING FROM,
# OUT OF OR IN CONNECTION WITH THE SOFTWARE OR THE USE OR OTHER DEALINGS IN
# THE SOFTWARE.
import time

import Adafruit_GPIO.SPI as SPI
import Adafruit_SSD1306
import Adafruit_DHT

from PIL import Image
from PIL import ImageDraw
from PIL import ImageFont

import subprocess

p=0
sensor=Adafruit_DHT.DHT11
gpio=27
humidity,temperature = Adafruit_DHT.read_retry(sensor,gpio)


# Raspberry Pi pin configuration:
RST = None     # on the PiOLED this pin isnt used
# Note the following are only used with SPI:
DC = 23
SPI_PORT = 0
SPI_DEVICE = 0


disp = Adafruit_SSD1306.SSD1306_128_64(rst=RST)


disp.begin()

# Clear display.
disp.clear()
disp.display()

# Create blank image for drawing.
# Make sure to create image with mode '1' for 1-bit color.
width = disp.width
height = disp.height
image = Image.new('1', (width, height))

# Get drawing object to draw on image.
draw = ImageDraw.Draw(image)

# Draw a black filled box to clear the image.
draw.rectangle((0,0,width,height), outline=0, fill=0)

# Draw some shapes.
# First define some constants to allow easy resizing of shapes.
padding = -2
top = padding
bottom = height-padding
# Move left to right keeping track of the current x position for drawing shapes.
x = 0


font = ImageFont.load_default()


while True:

    # Draw a black filled box to clear the image.
    draw.rectangle((0,0,width,height), outline=0, fill=0)

    # Shell scripts for system monitoring from here : https://unix.stackexchange.com/questions/119126/command-to-display-memory-usage-disk-usage-and-cpu-load
    cmd = "hostname -I | cut -d\' \' -f1"
    IP = subprocess.check_output(cmd, shell = True )
    cmd = "top -bn2 -d 0.1 | grep %Cpu | awk 'NR==2{printf \"CPU: %.2f%%\",100-$8}'"
    CPU = subprocess.check_output(cmd, shell = True )
    cmd = "free -m | awk 'NR==2{printf \"Mem: %s/%sMB %.2f%%\", $3,$2,$3*100/$2 }'"
    MemUsage = subprocess.check_output(cmd, shell = True )
    cmd = "df -h | awk '$NF==\"/\"{printf \"Disk: %d/%dGB %s\", $3,$2,$5}'"
    Disk = subprocess.check_output(cmd, shell = True )
    humidity,temperature = Adafruit_DHT.read_retry(sensor,gpio)
    cmd = "date | awk '{printf \"%s %s %s %s \", $1,$2,$3,$4}'"
    date = subprocess.check_output(cmd, shell = True )
    cmd = "cat /sys/class/thermal/thermal_zone0/temp | awk '{printf \"%.1f\", $0/1000}'"
    cput = subprocess.check_output(cmd, shell= True)


    # Write two lines of text.
    draw.text((x, top),       "IP: " + str(IP),  font=font, fill=255)
    draw.text((x, top+8),     str(CPU), font=font, fill=255)
    draw.text((x+80, top+8),  str(cput),font=font, fill=255)
    draw.text((x, top+16),    str(MemUsage),  font=font, fill=255)
    draw.text((x, top+25),    str(Disk),  font=font, fill=255)
    draw.text((x, top+34),    "temperature: " + str(temperature),font=font,fill=255)
    draw.text((x, top+43),    "humidity: " + str(humidity),font=font,fill=255)
    draw.text((x, top+54),    str(date),  font=font, fill=255)

    disp.image(image)
    disp.display()
    time.sleep(.1)
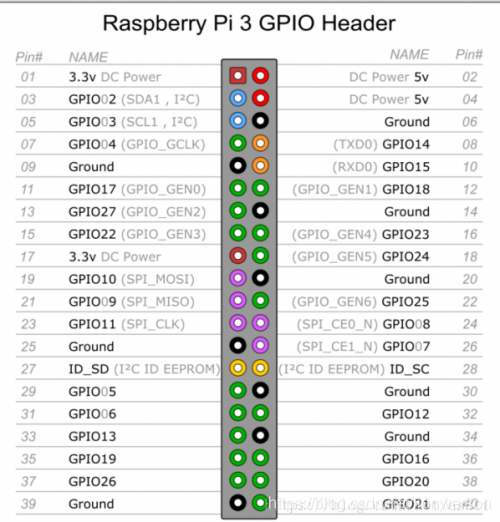
在驱动示例文件上,我加上了DHT11模块,来显示温度和湿度,屏幕的scl和sda引脚连接到了树莓派的3号和5号引脚,DHT11的out引脚连接到13号引脚
树莓派要驱动iic,必须要现在配置界面开启iic通信!
用树莓派配置工具开启iic
raspi-config
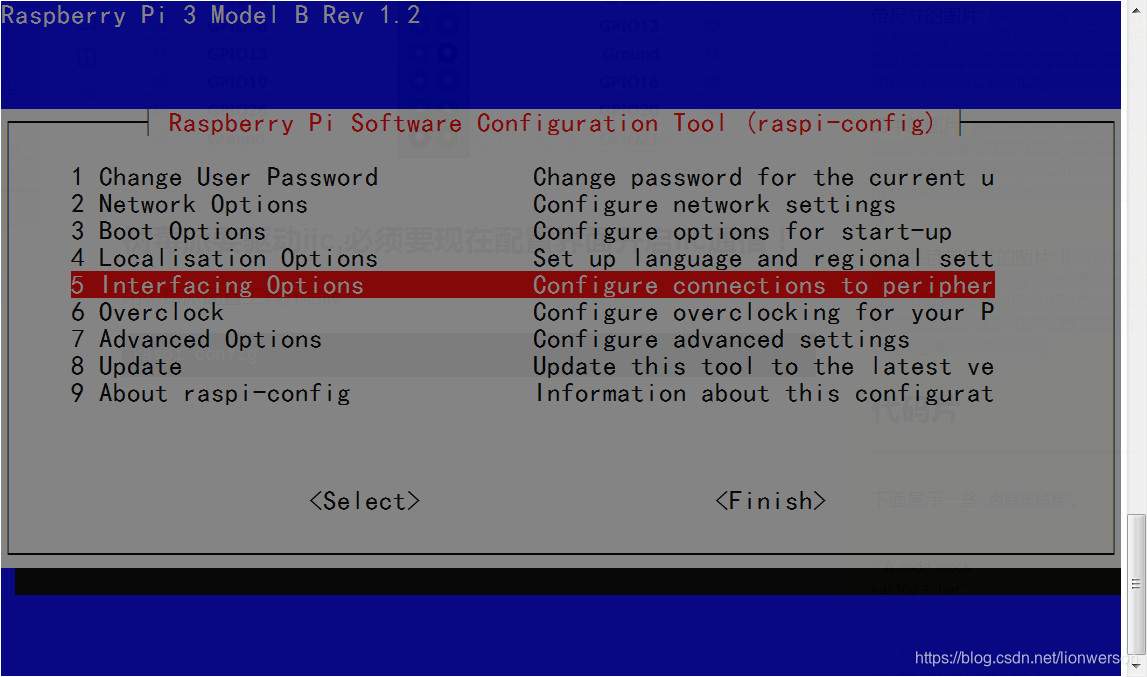
选择图中的选项
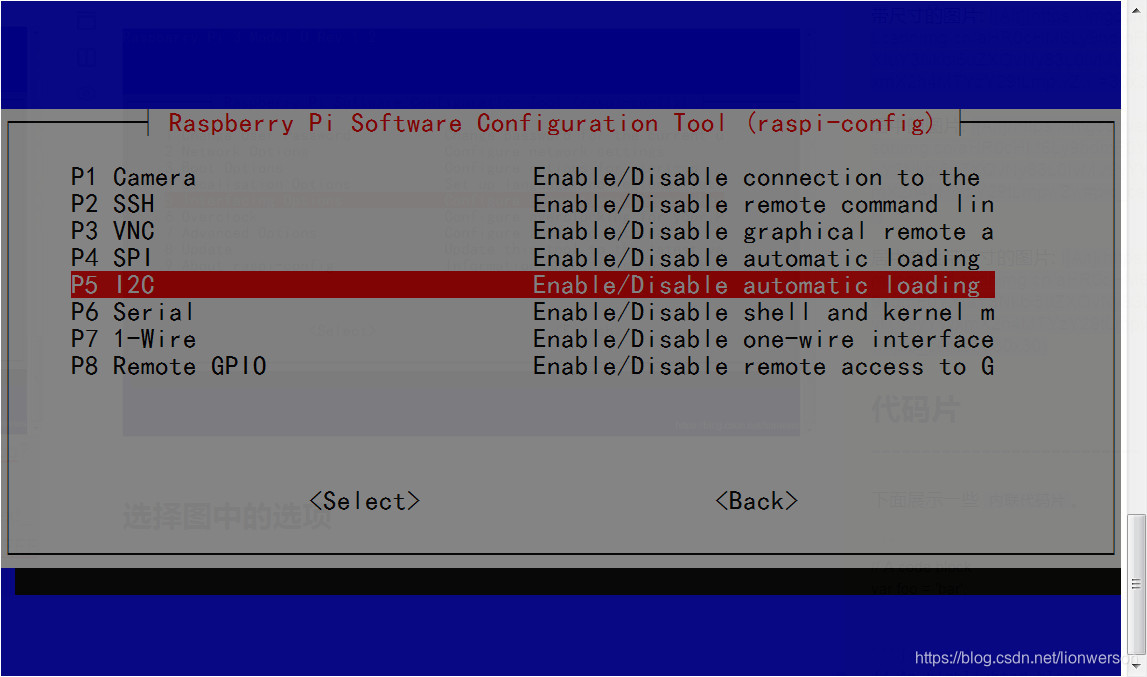
选择I2C
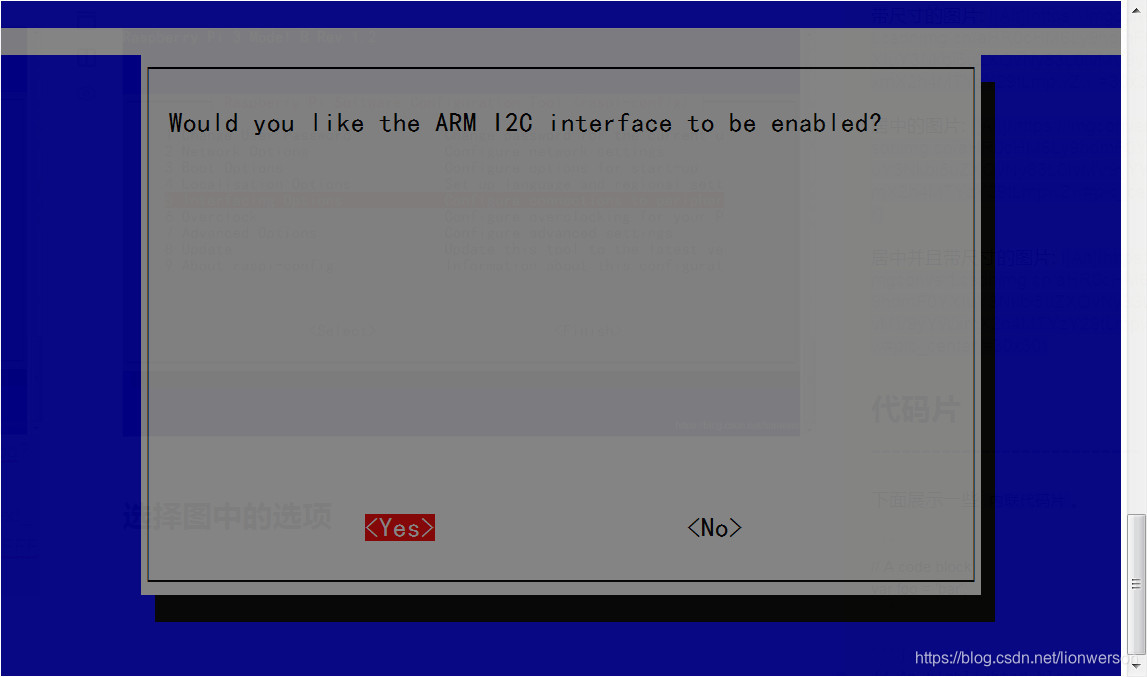
选择yes
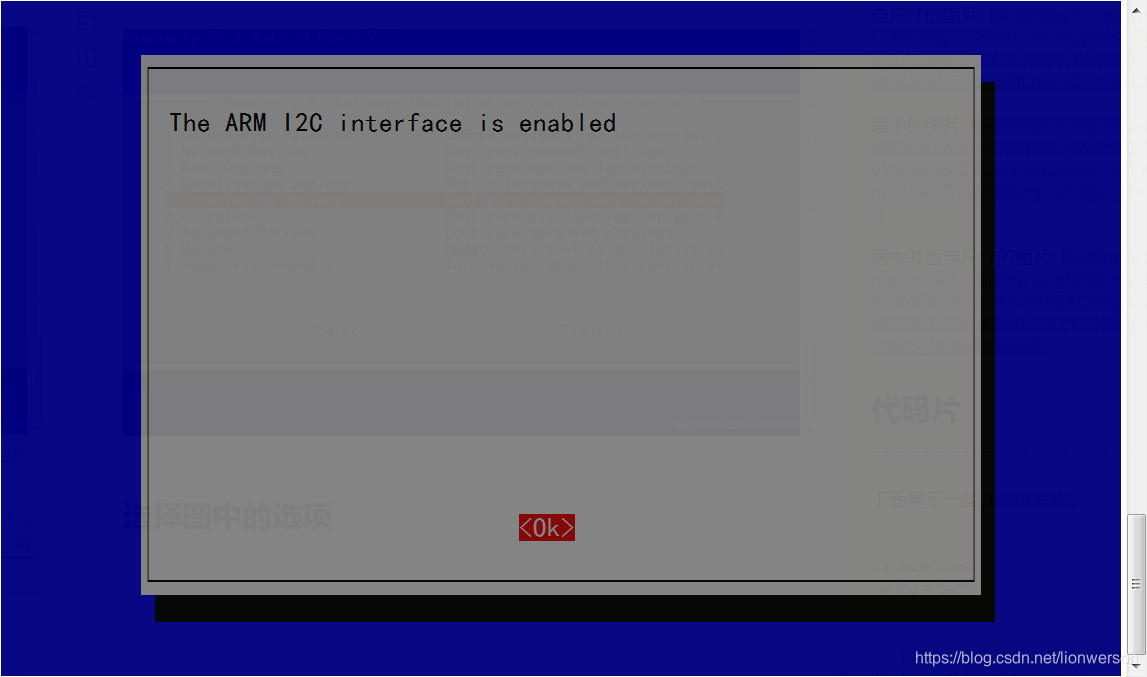
可以看到 I2C已经开启了!
sudo i2cdetect -y 1
可以用这个命令来查看是否已经开启。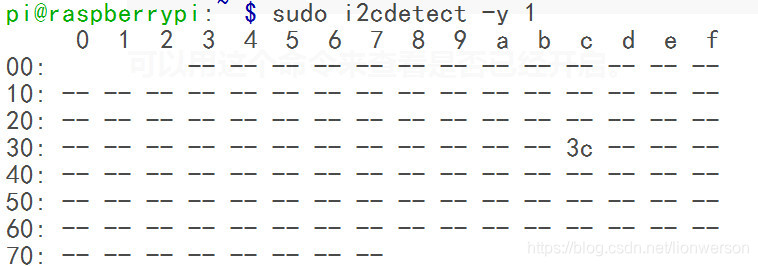
树莓派我只连接了一个屏幕,从上图可以看到。
可以设置为开机启动。
原文链接:https://blog.csdn.net/lionwerson/article/details/103314825
叨叨几句... NOTHING