


中文 英文 韩语 日语
LCD 1602 液晶屏模块的使用,之前在「基于PHP探针和Python爬虫的服务器监控」一文中有详细介绍。这个屏幕还有一种 I2C 方式的驱动模块,可以极大的简化接线和驱动程序。下面树莓派实验室将对这个模块的使用做一个介绍。
硬件说明
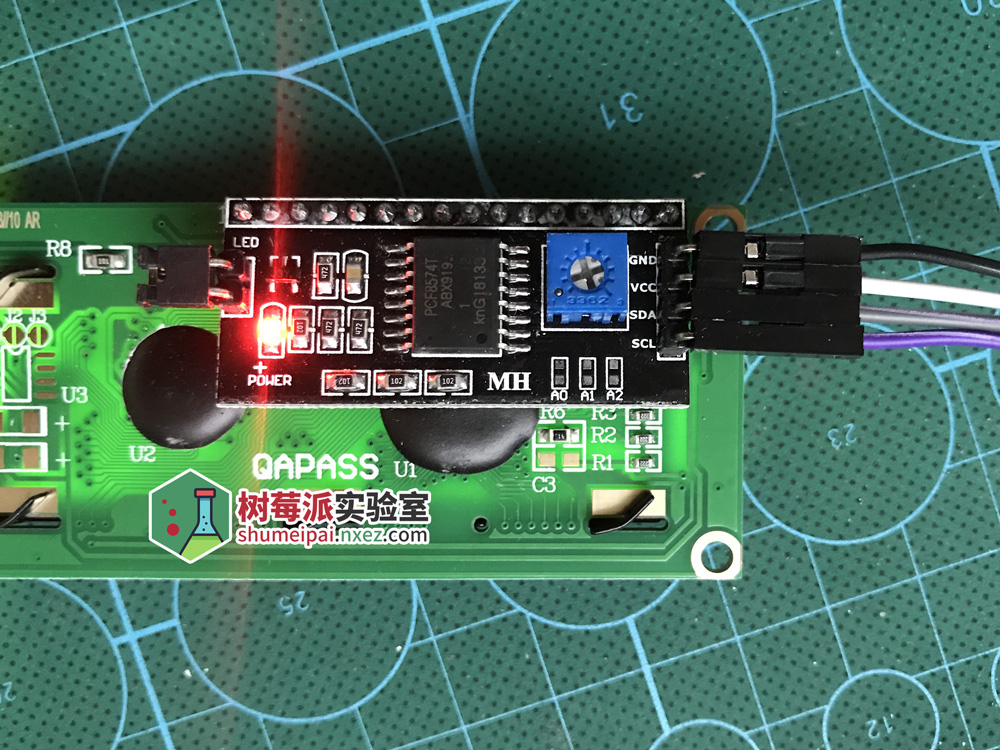
带 I2C 模块的 1602 屏幕背面如图所示。模块上有一颗可调电阻,用于调节显示的对比度。(购买链接,如果你新拿到一块屏幕无论怎么调试都不见显示,记得调节一下这里)
接线
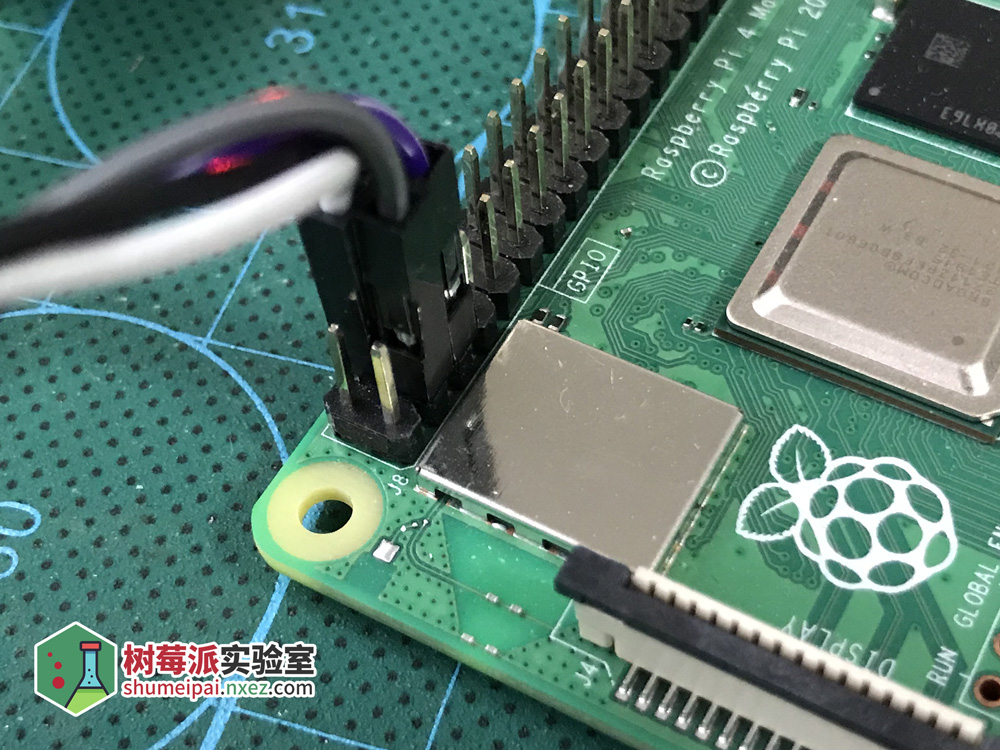
| 1234 | GND --- GNDVCC --- 接树莓派 5VSDA --- I2C 数据SCL --- I2C 时钟 |

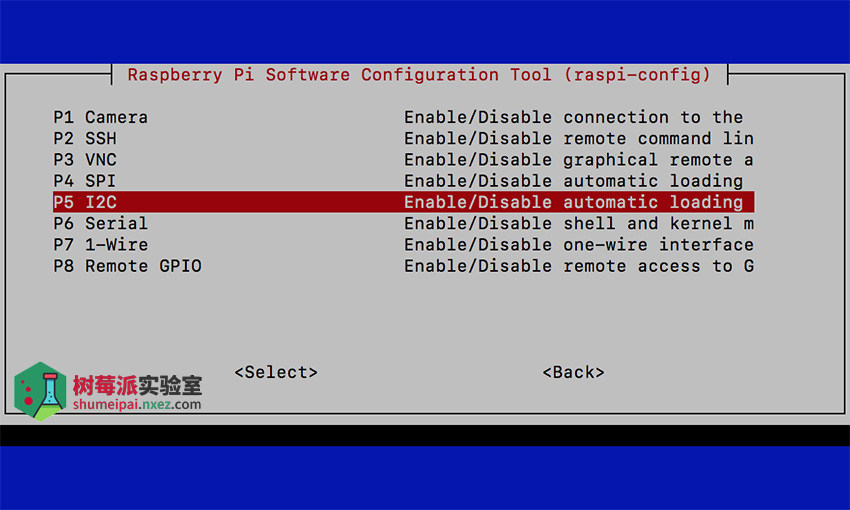
启用树莓派的I2C功能
| 123 | sudo apt-get install -y python-smbussudo apt-get install -y i2c-toolssudo raspi-config |
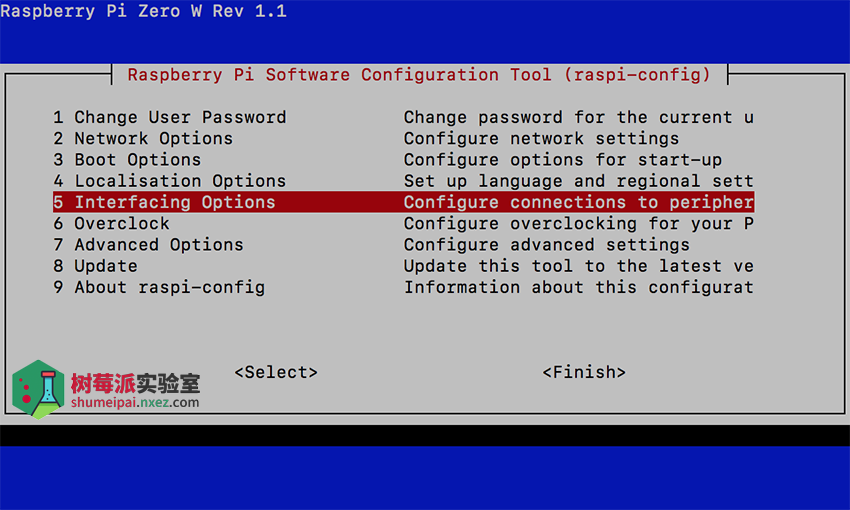
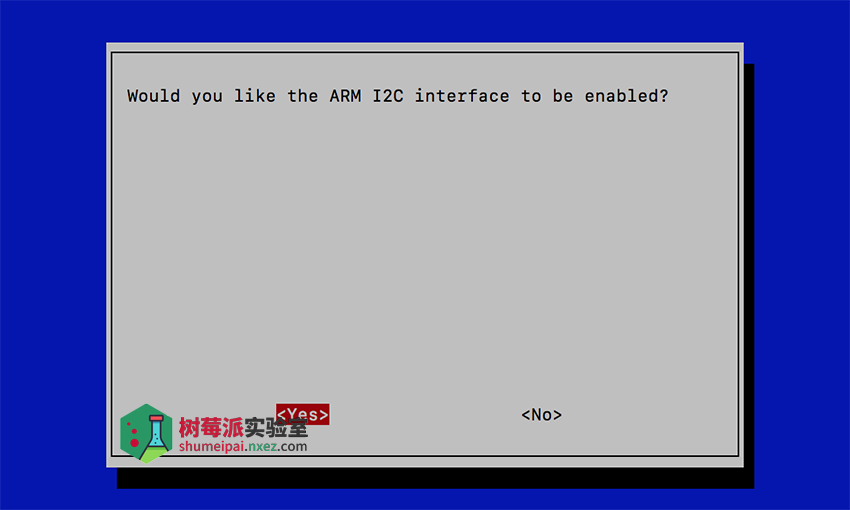
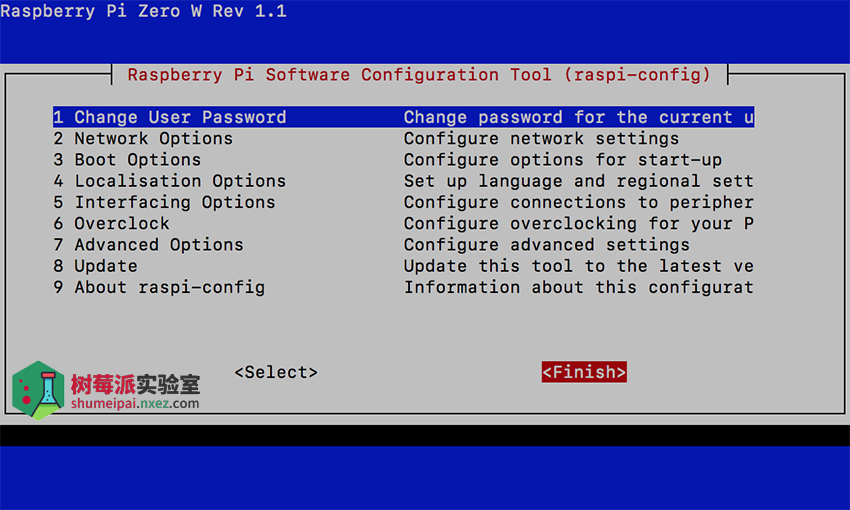
按照下面的步骤设置开启 I2C 功能。
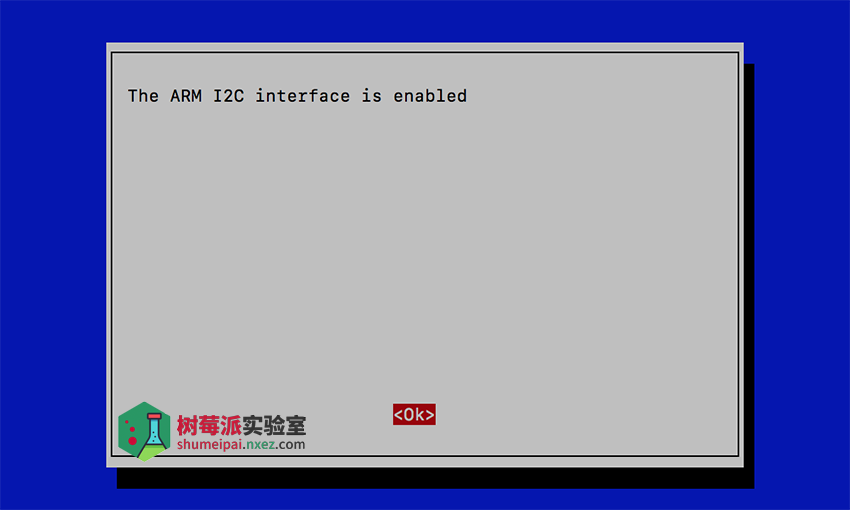
重启树莓派。
| 1 | sudo reboot |
然后运行下面的命令看一下是否识别到屏幕。
| 1 | sudo i2cdetect -y 1 |
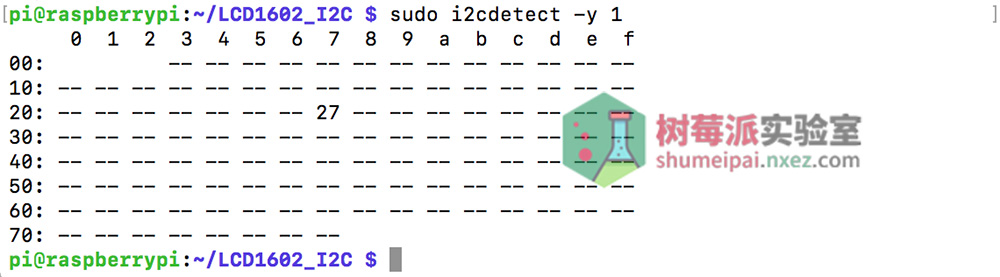
看到地址为 0x27,这说明已经成功连接了 LCD1602 屏幕。接下来就可以用 Python 控制 LCD1602 显示信息了。
编程
这里用到一个驱动程序,将下面的代码保存为 LCD1602.py。
import time
import smbus
BUS = smbus.SMBus(1)
LCD_ADDR = 0x27
BLEN = 1 #turn on/off background light
def turn_light(key):
global BLEN
BLEN = key
if key ==1 :
BUS.write_byte(LCD_ADDR ,0x08)
else:
BUS.write_byte(LCD_ADDR ,0x00)
def write_word(addr, data):
global BLEN
temp = data
if BLEN == 1:
temp |= 0x08
else:
temp &= 0xF7
BUS.write_byte(addr ,temp)
def send_command(comm):
# Send bit7-4 firstly
buf = comm & 0xF0
buf |= 0x04 # RS = 0, RW = 0, EN = 1
write_word(LCD_ADDR ,buf)
time.sleep(0.002)
buf &= 0xFB # Make EN = 0
write_word(LCD_ADDR ,buf)
# Send bit3-0 secondly
buf = (comm & 0x0F) << 4
buf |= 0x04 # RS = 0, RW = 0, EN = 1
write_word(LCD_ADDR ,buf)
time.sleep(0.002)
buf &= 0xFB # Make EN = 0
write_word(LCD_ADDR ,buf)
def send_data(data):
# Send bit7-4 firstly
buf = data & 0xF0
buf |= 0x05 # RS = 1, RW = 0, EN = 1
write_word(LCD_ADDR ,buf)
time.sleep(0.002)
buf &= 0xFB # Make EN = 0
write_word(LCD_ADDR ,buf)
# Send bit3-0 secondly
buf = (data & 0x0F) << 4
buf |= 0x05 # RS = 1, RW = 0, EN = 1
write_word(LCD_ADDR ,buf)
time.sleep(0.002)
buf &= 0xFB # Make EN = 0
write_word(LCD_ADDR ,buf)
def init_lcd():
try:
send_command(0x33) # Must initialize to 8-line mode at first
time.sleep(0.005)
send_command(0x32) # Then initialize to 4-line mode
time.sleep(0.005)
send_command(0x28) # 2 Lines & 5*7 dots
time.sleep(0.005)
send_command(0x0C) # Enable display without cursor
time.sleep(0.005)
send_command(0x01) # Clear Screen
BUS.write_byte(LCD_ADDR ,0x08)
except:
return False
else:
return True
def clear_lcd():
send_command(0x01) # Clear Screen
def print_lcd(x, y, str):
if x < 0:
x = 0
if x > 15:
x = 15
if y <0:
y = 0
if y > 1:
y = 1
# Move cursor
addr = 0x80 + 0x40 * y + x
send_command(addr)
for chr in str:
send_data(ord(chr))
if __name__ == '__main__':
init_lcd()
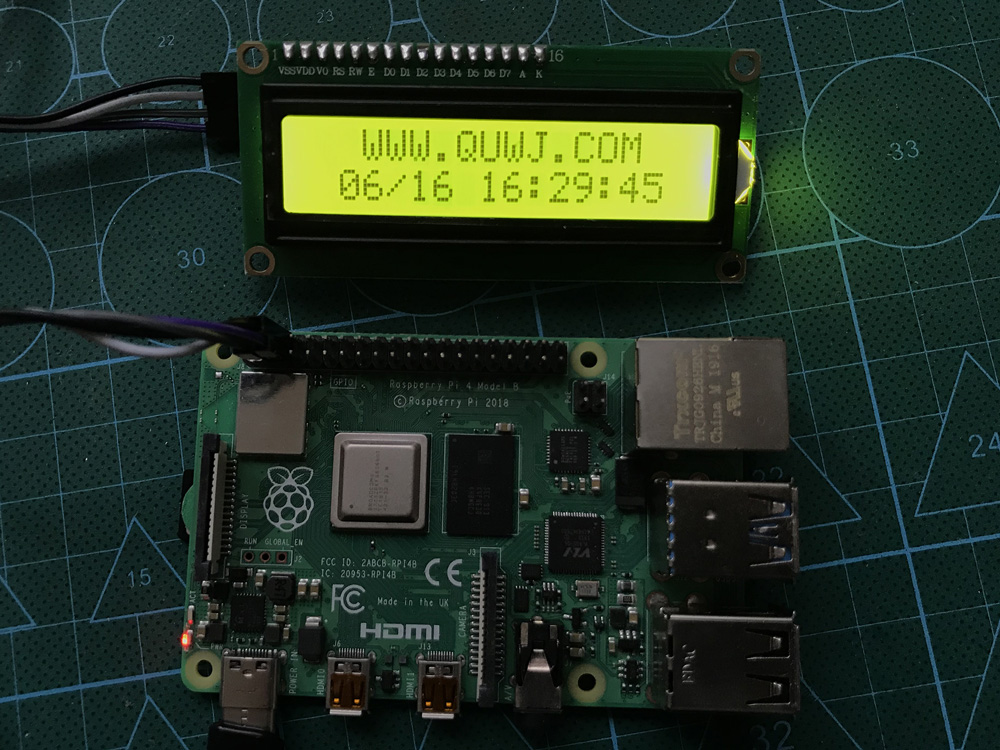
print_lcd(0, 0, 'Hello, world!')然后编写一个显示当前时间的示例程序,将下面的代码保存为 time.py。文件需要保存与 LCD1602.py 同一个目录下面。
#!/user/bin/env python
import smbus
import time
import sys
import LCD1602 as LCD
if __name__ == '__main__':
LCD.init_lcd()
time.sleep(1)
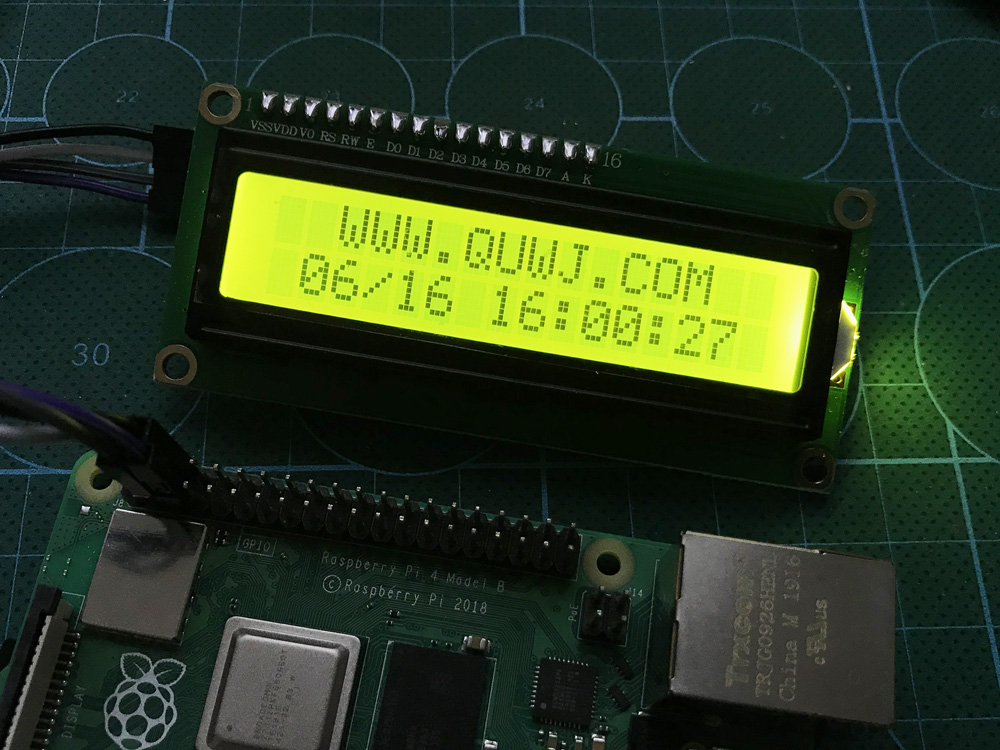
LCD.print_lcd(2, 0, 'WWW.QUWJ.COM')
for x in xrange(1, 4):
LCD.turn_light(0)
LCD.print_lcd(4, 1, 'LIGHT OFF')
time.sleep(0.5)
LCD.turn_light(1)
LCD.print_lcd(4, 1, 'LIGHT ON ')
time.sleep(0.5)
LCD.turn_light(0)
while True:
now = time.strftime('%m/%d %H:%M:%S', time.localtime(time.time()))
LCD.print_lcd(1, 1, now)
time.sleep(0.2)其中 LCD.print_lcd() 用来显示字符,前两个参数分别表示 X、Y 坐标(从 0 开始),后面的内容将从这个坐标的位置开始显示。第三个参数就是要显示的内容了。
LCD.turn_light(0) 表示关闭背光,LCD.turn_light(1) 表示打开背光。
在程序目录下执行下面的命令运行。
| 1 | sudo python time.py |
你还可以根据自己的需求,编写显示 IP 地址(参考这里)、系统状态信息的程序,并设置成开机启动(参考这里)来使用这块屏幕。文章标题:树莓派通过 I2C 驱动 LCD1602 液晶屏 - 树莓派实验室固定链接:https://shumeipai.nxez.com/2020/06/17/raspberry-pi-drives-lcd1602-screen-through-i2c.html
叨叨几句... NOTHING